

Although all the documentation provided by Github, and references on google, could resolve on getting your job done. Just wanted to draft the process:
- Create a node app
- Build a local image & run
- Setup docker with Github authentication (esp. for private repos)
- tag and deploy docker image to Github
- (Bonus) enable github action to build an image automatically for every release that you create.
Create a Node App
Below commands will simply create a folder and initialise a basic node application
mkdir hello-github-package && cd hello-github-package
npm init -y
In order to make this a little extra fun, you can go ahead and run the below steps to setup a simple express application
vi server.js
Once the editor pop's up, click i to make it editable, and paste the below code
const express = require('express')
const app = express()
const port = 3000

app.get('/', (req, res) => {
  res.send('Hello Github Packages!')
})

app.listen(port, () => {
  console.log(`Example app listening at http://localhost:${port}`)
})
Just one more step, before we can run the application:
npm install express
Thats it! we have an REST API with node Up and Running with the below command:
node server.js
Once you go to browser and hit, http://localhost:3000/ you will see the message 'Hello Github Packages!'
Build a local image & run
Now, I am hoping you already have Docker up and running in your machine. Lets add few simple docker configuration files, and we should be able to see the same message from Docker.
Lets create a file named Dockerfile and paste the following content.
FROM node:14

# Create app directory
WORKDIR /usr/src/app

# Install app dependencies
# A wildcard is used to ensure both package.json AND package-lock.json are copied
# where available (npm@5+)
COPY package*.json ./

RUN npm install
# If you are building your code for production
# RUN npm ci --only=production

# Bundle app source
COPY . .

EXPOSE 3000
CMD [ "node", "server.js" ]
Lets build the image, by simply running the below command:
docker build -t hello-github-package:latest .
NOTE: do not forget the . at the end, or else it will give you an error.
Once its build, you can run the following command
docker run -p 3000:3000 hello-github-package:latest
Same as step #1, you should be able to go to same URL and see the same message!
Now that you have create the image locally, its time to publish it to Github.
Setup docker with Github authentication (esp. for private repos)
There are few things to take note, so lets start with the going to Github and creating a personal token
Lets go to github and select "generate a token", in the permission section you only need to provide access to write:packages so lets select that:
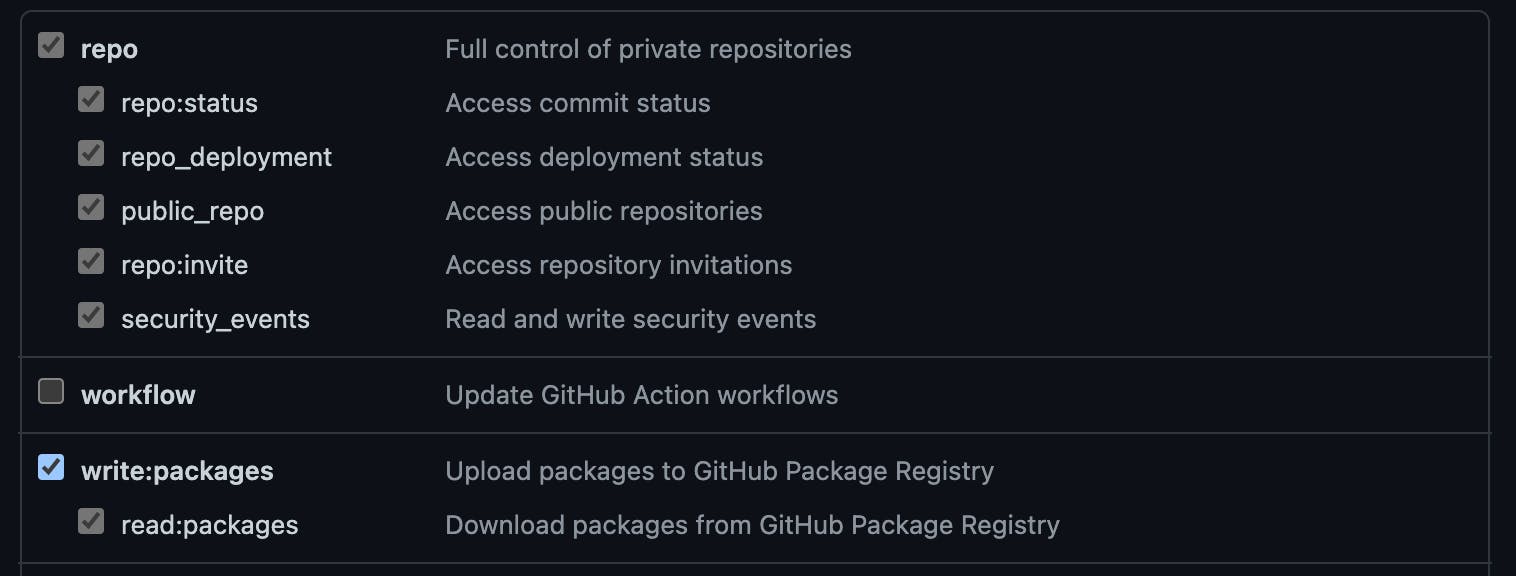
Once done, lets copy the key, and save it in the txt file, and remember the location, and the name.
For me, i have saved it at ~/Desktop and with the name TOKEN.txt
Final step for this section is to login,
cat ~/Desktop/TOKEN.txt | docker login https://docker.pkg.github.com -u GITHUB_USERNAME --password-stdin
before running the above command, lets update the GITHUB_USERNAME to your github username for me it will be shah-smit
Once done, it should say Login Succeeded
We are almost there, hang in there.
Tag and Deploy docker image to Github
Please note, for this you have a github repository already configured.
Once the Repo is configured, lets build the Docker Tag command.
Please note it has variable data, so please update before executing.
docker build -t docker.pkg.github.com/GITHUB_USERNAME/REPO_NAME/IMAGE_NAME:VERSION .
GITHUB_USERNAME It is nothing but your github username, for me, it is shah-smit
REPO_NAME it is the repo where this docker image will be published so for this example, i want to it publish here
IMAGE_NAME I often prefer to keep it same as repo name, just for consistency and avoiding confusion
VERSION you may put any string, i prefer 1.0.0 format. For more, you may read on semver
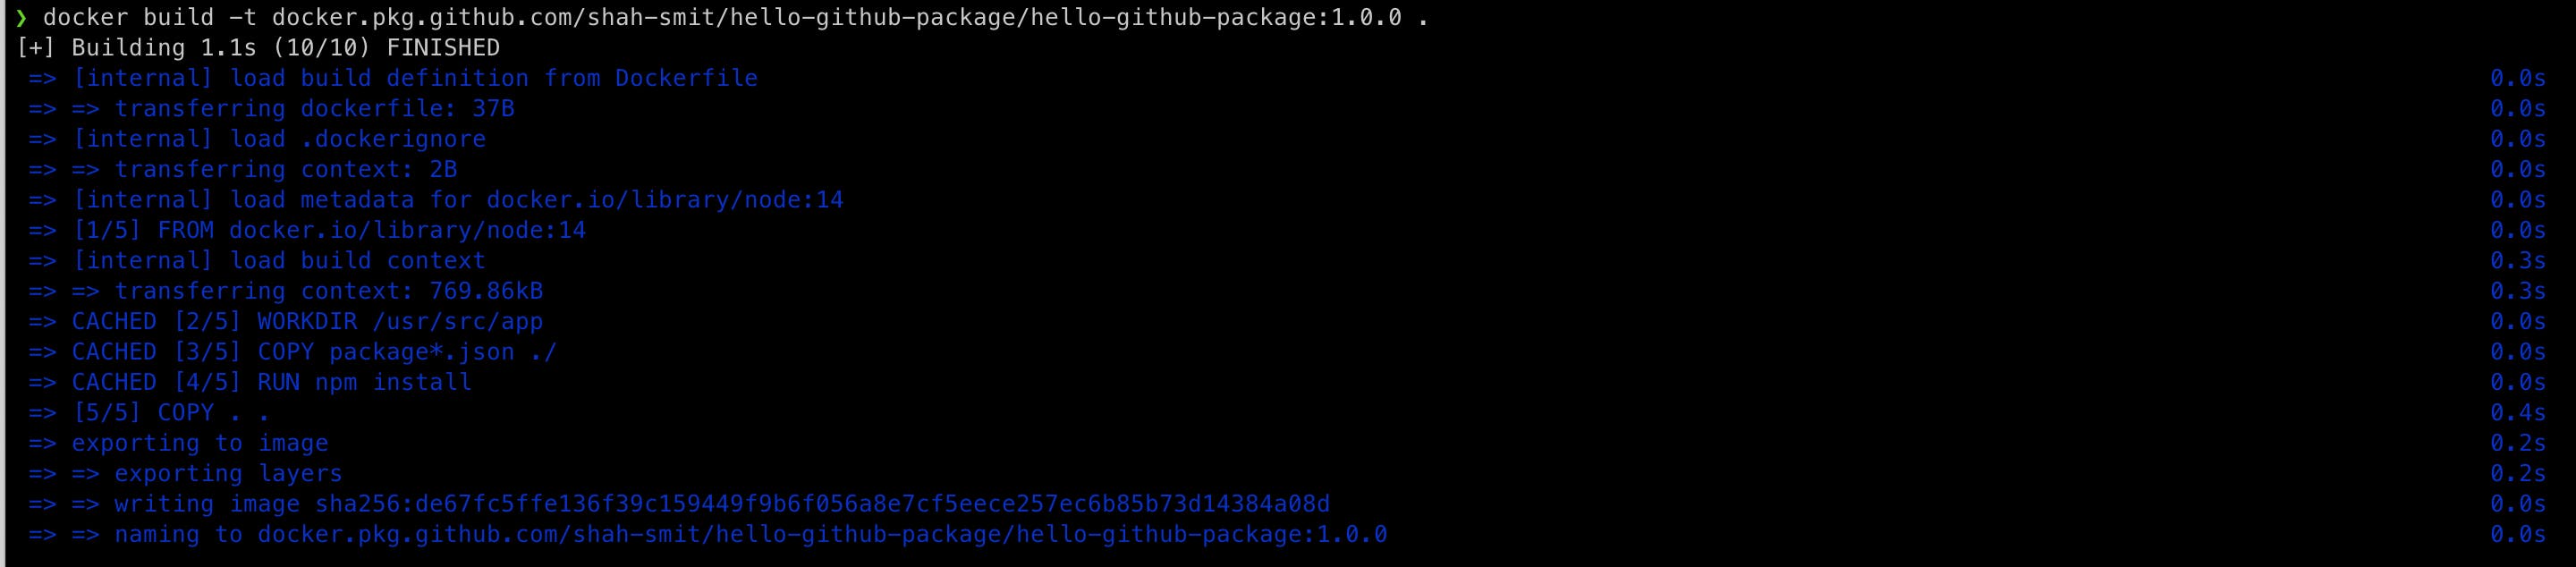
Hence the final command will look like:
docker build -t docker.pkg.github.com/shah-smit/hello-github-package/hello-github-package:1.0.0 .
It may give you similar to following output:
Above command was just to build and tag, now its time to push to Github
docker push docker.pkg.github.com/GITHUB_USERNAME/REPO_NAME/IMAGE_NAME:VERSION
Same as above, please update the variable data with your values, for me it will be
docker push docker.pkg.github.com/shah-smit/hello-github-package/hello-github-package:1.0.0
Once started, it may take some time, lets grab a coffee and come back!
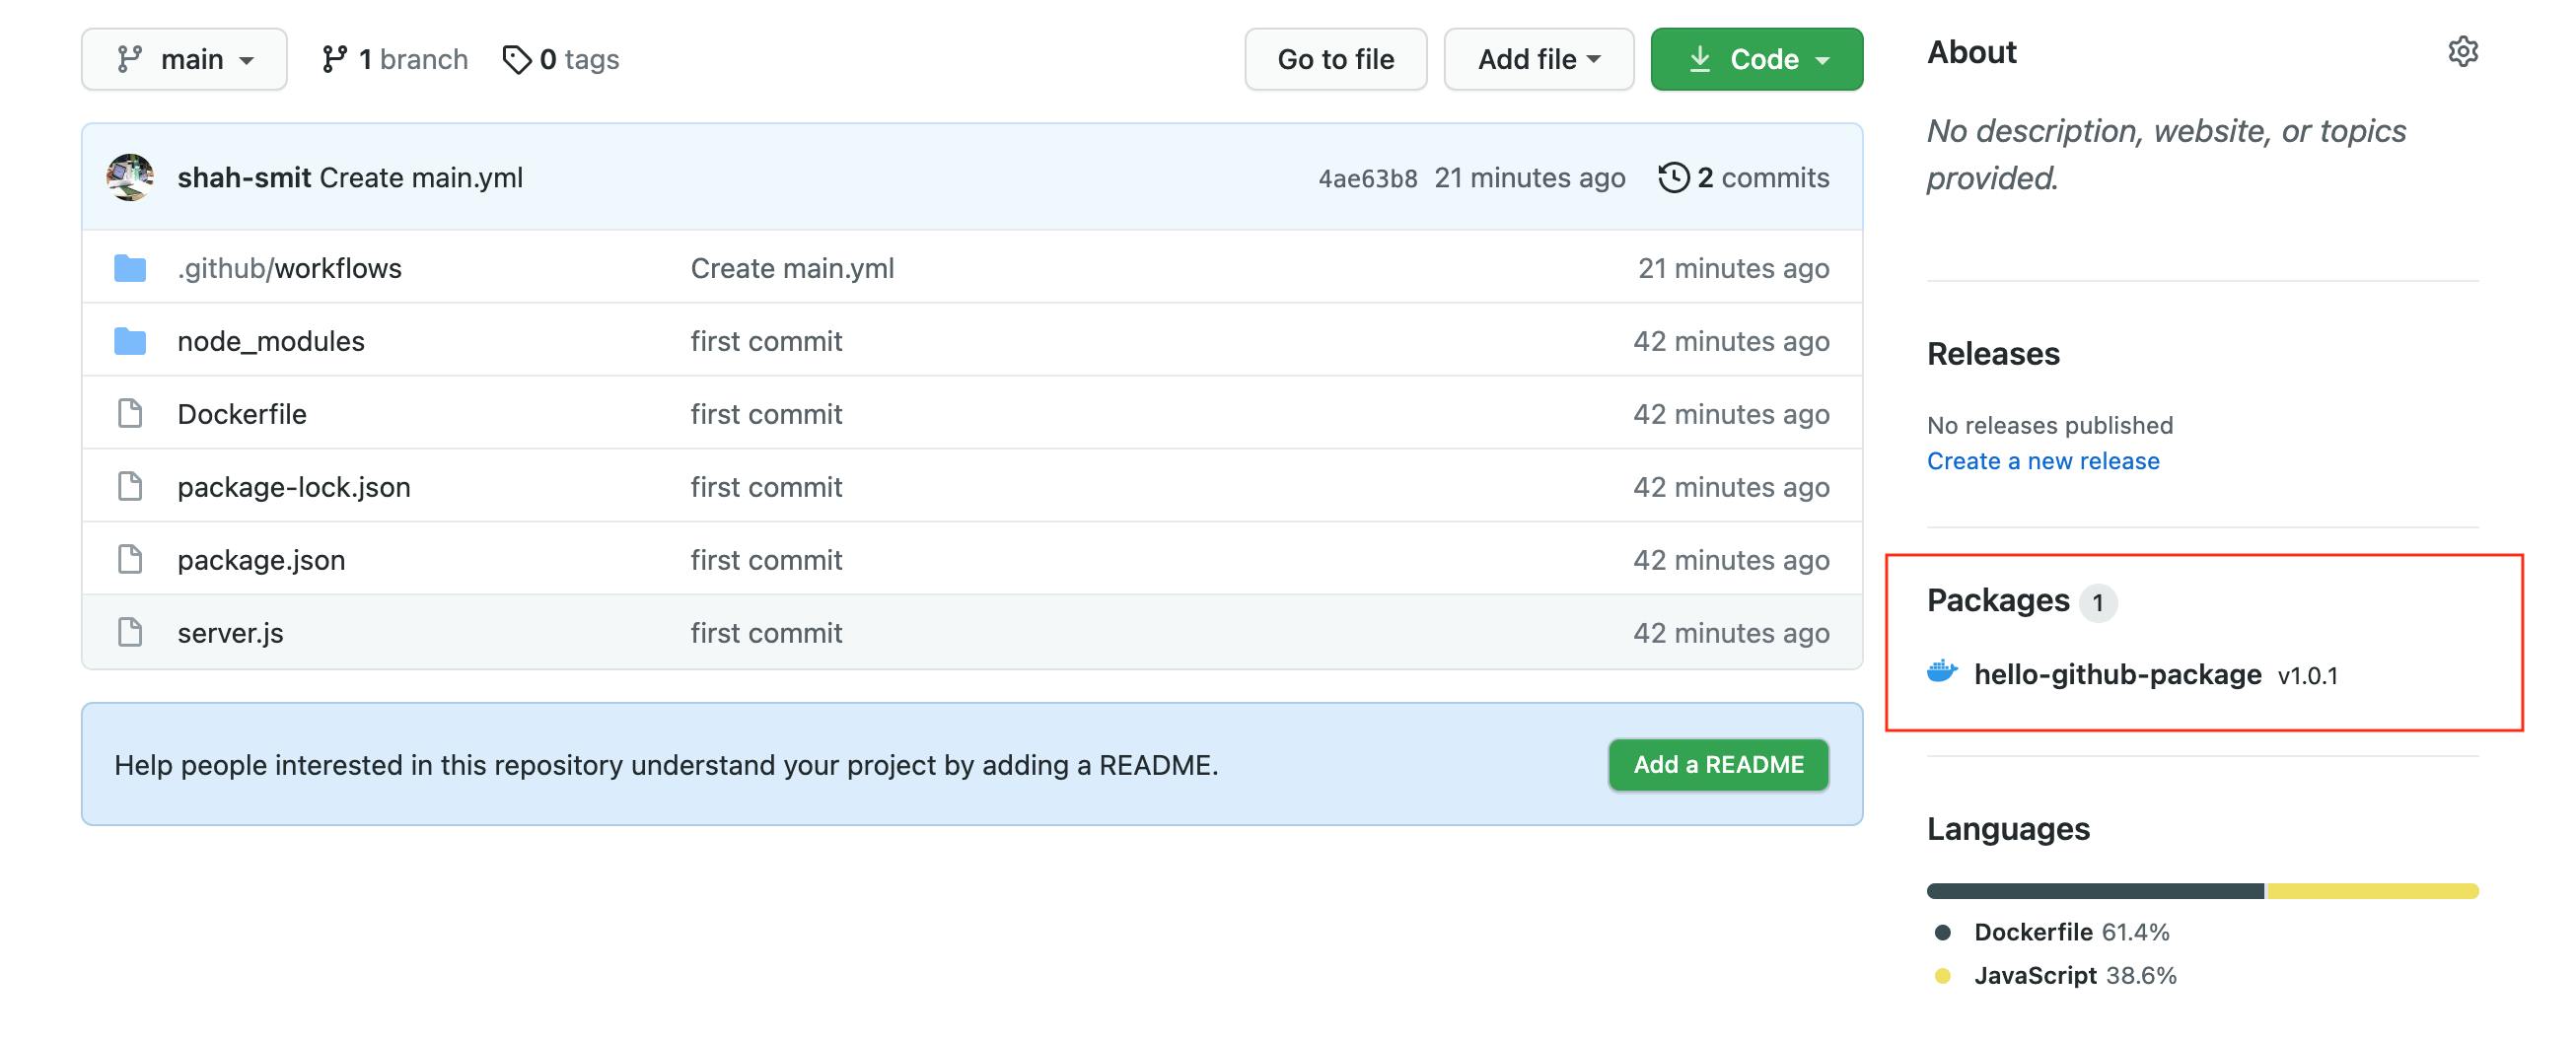
Once completed, in your github, go to the Repo, under packages section you will be able to see a package published:
Enable Github action to build an image automatically for every release that you create.
Congrats on publishing your very first Docker image on Github, lets automate this, such that we dont have to run the same commands every time we do a release!
There are few steps to this, but mainly everything is to be configured in the github portal only.
Step 1: Go to the Repo, select "Actions"
Step 2: Select the hyperlink, set up a workflow yourself
Step 3: In the editor, put the below code snippet, but change the repository url to your github configured:
name: Publish Docker image
on:
  release:
    types: [published]
jobs:
  push_to_registry:
    name: Push Docker image to GitHub Packages
    runs-on: ubuntu-latest
    steps:
      - name: Check out the repo
        uses: actions/checkout@v2
      - name: Push to GitHub Packages
        uses: docker/build-push-action@v1
        with:
          username: ${{ github.actor }}
          password: ${{ secrets.GITHUB_TOKEN }}
          registry: docker.pkg.github.com
          repository: shah-smit/hello-github-package/hello-github-package
          tag_with_ref: true
Step 4: Commit the changes to the main branch
Step 5: Create a release in the release section of the github
Step 5.1: Set the version as 1.0.1 just a slightly different then the one we published manually to see if the action we configured in step 3 is working
Step 5.2 set the "Release title" as per your requirements, for my use case, i have kept "Initial Release"
Step 5.3 Select "Publish" at the bottom of the page
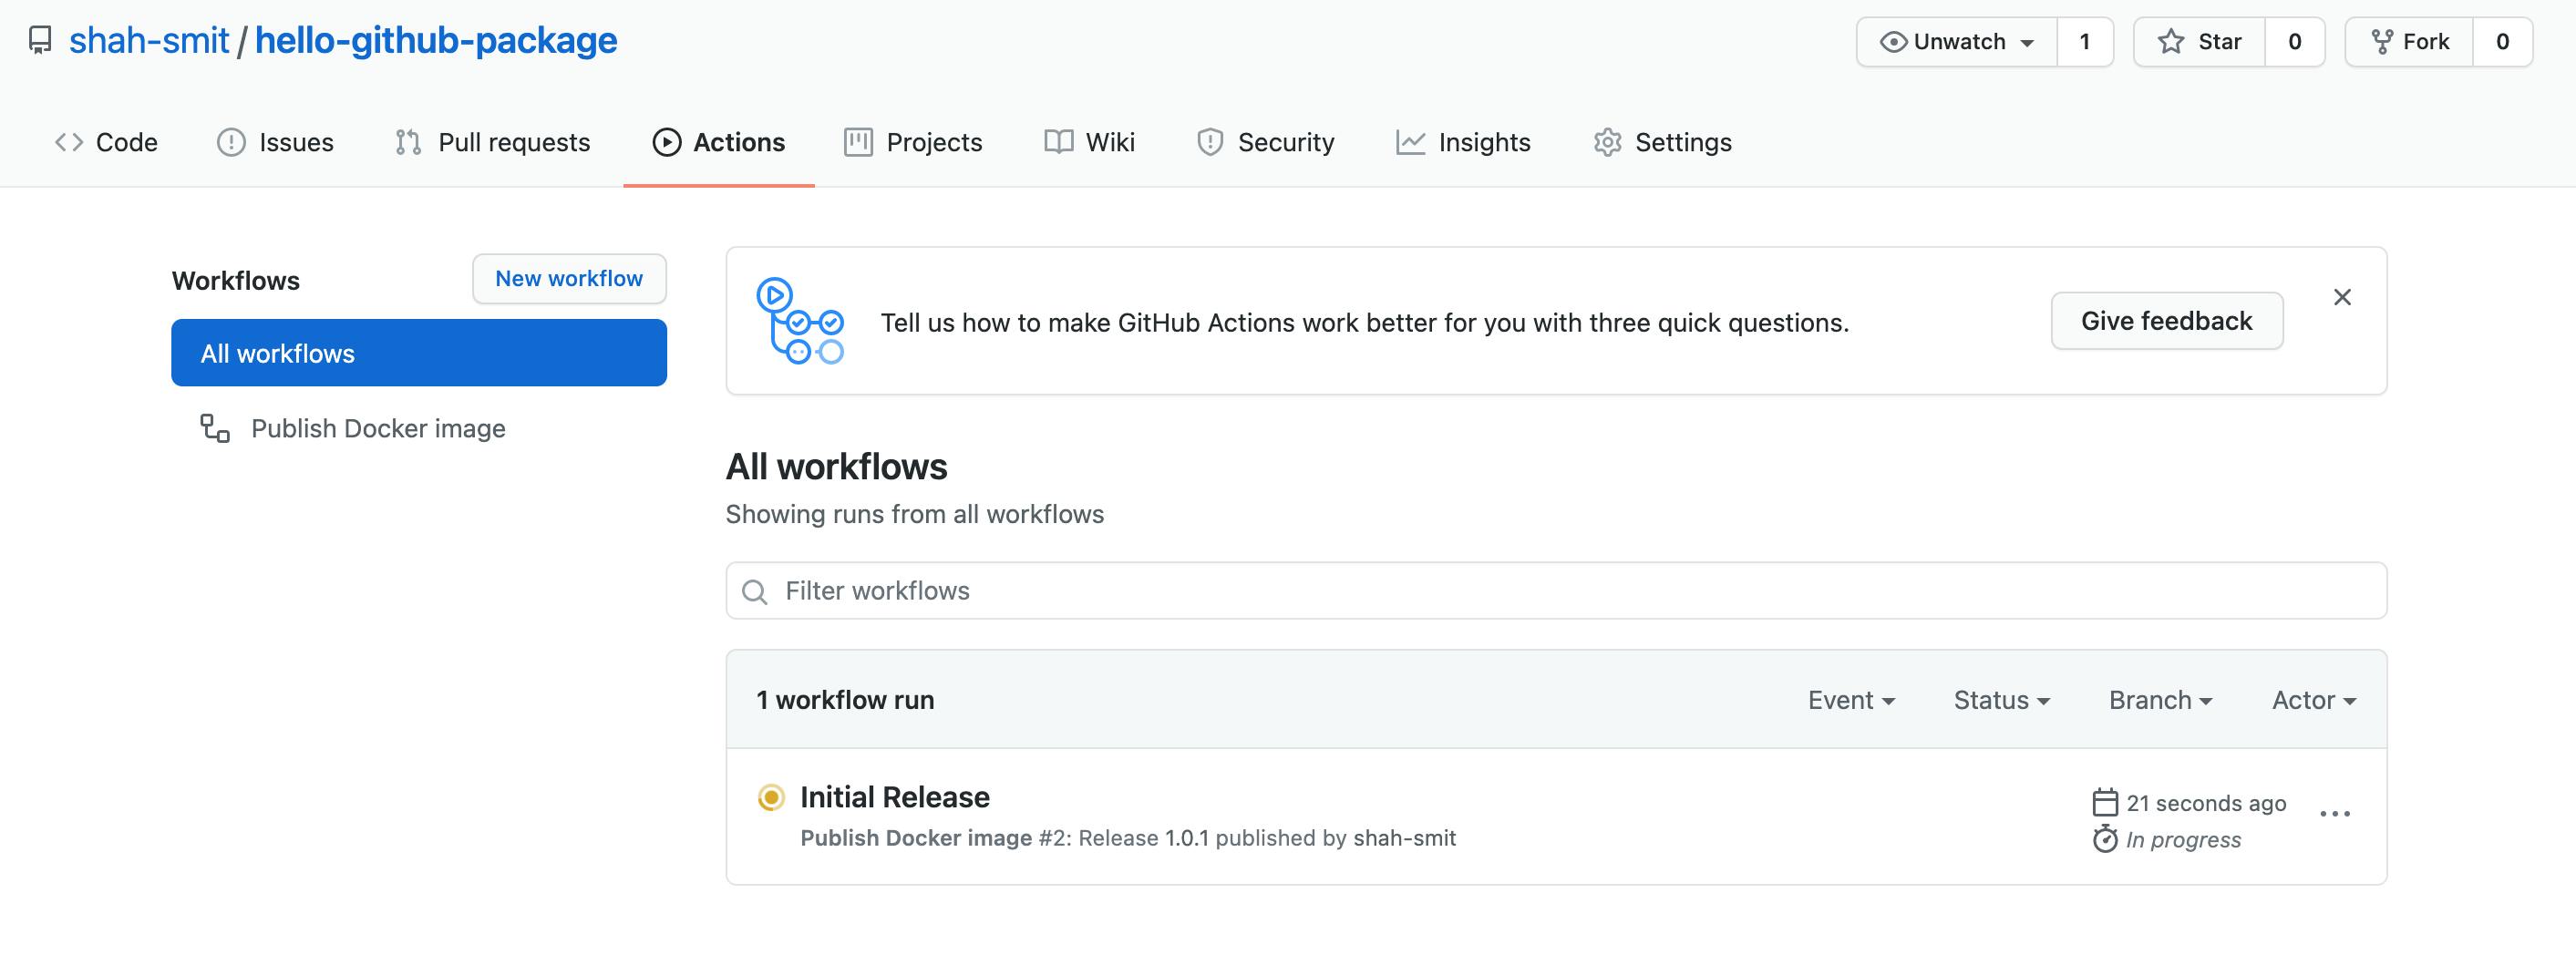
Lets go back to Actions tab, you will see that Release has triggered the action and build has been started
Thats It! This marks the end of the documentation and the my very first post in Hashnode Feel free to provide any feedback or suggestion.
I will be creating the video, as a walkthrough for this documentation with live demo.